When-Then Rules
When-Then rules are used in combination with the or-rules UI component. They are meant to be used to allow application users to define 'When this, then that' statements. For example "During weekdays, when it's cold, turn on the lights 5 minutes before sunset" or "send push notification to anybody who reaches the stadium".
Supported actions
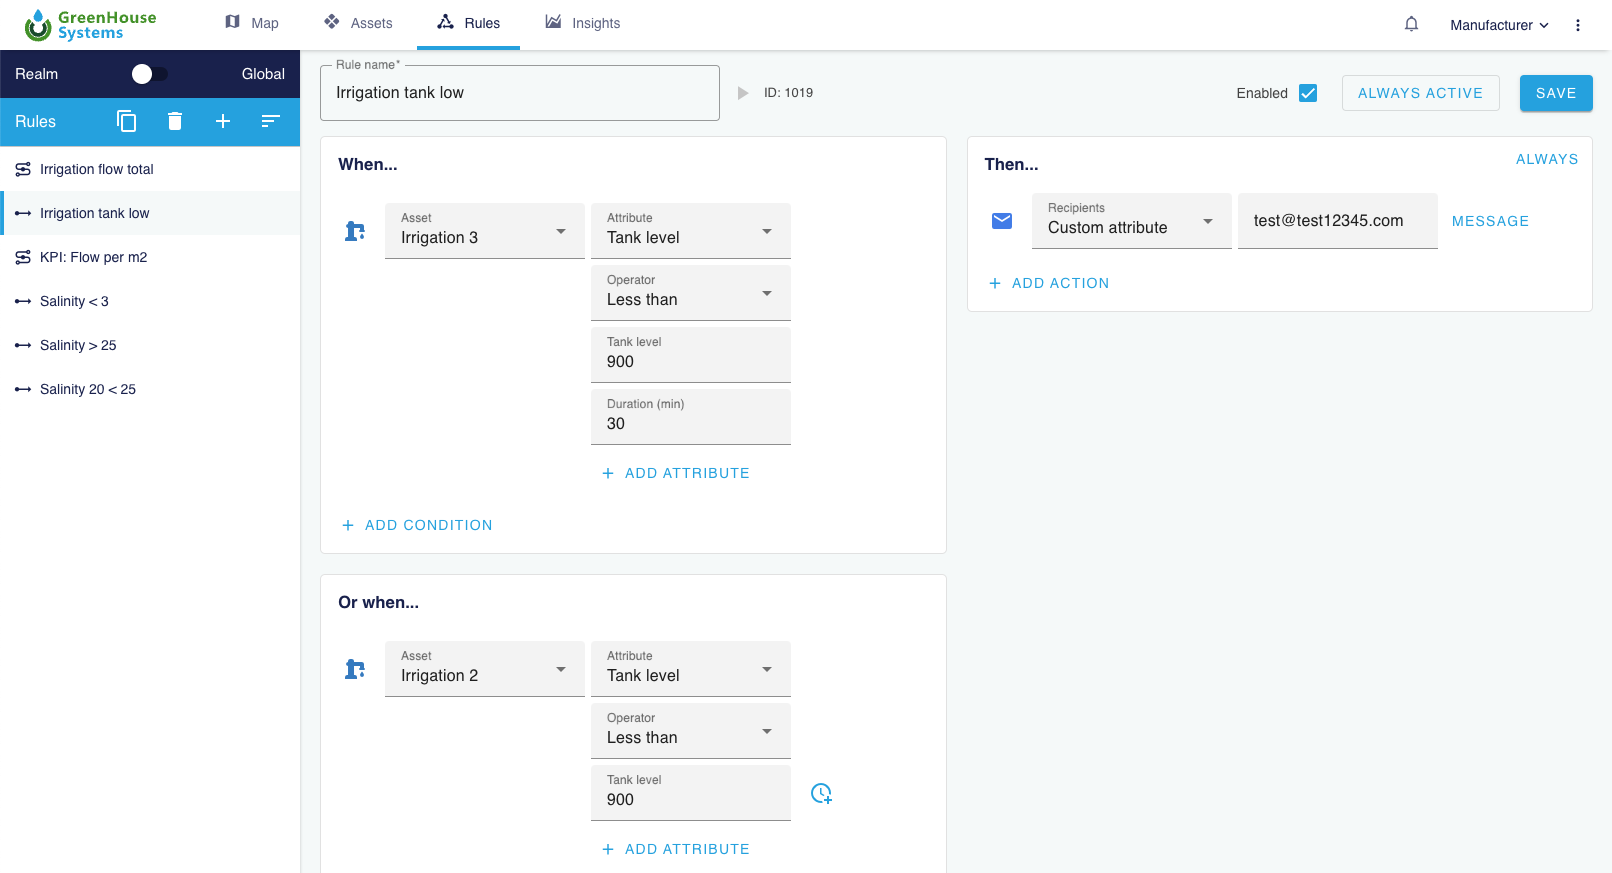
On the left hand side you can have conditions for triggering:
- Attribute value conditions
- Timer, inluding time of day, sunset, sunrise twilight.
- Duration: the number of minutes the attribute value condition or timer condition needs to be true
On the right hand side you can trigger different types of actions:
- Update attribute values
- Send push- and email notifications to users, assets, or users linked to the asset triggering the rule. Notifications support multi-language notification based on the users preferred language. For details see Appearance page.
Using Placeholders in Notifications
When configuring notifications in your rules, you can use the following placeholders to include dynamic information:
%TRIGGER_ASSETS%- Includes details about the assets that triggered the rule%RULESET_NAME%- Inserts the name of the current ruleset%RULESET_ID%- Inserts the ID of the current ruleset%ASSET_ID%- Includes the ID of the triggering asset (when used in notification actions)
These placeholders are automatically replaced with actual values when the rule executes, making it easy to create dynamic, context-aware notifications.
- Generate alarm, including assigned user, severity, status, title and message with linked assets. See more details in the Alarms documentation.
- Link to an external system with webhooks. This can be used e.g. for connecting to your Maintenance or Messaging service, using your ERP or CRM system.
Guide to setting up your first When-Then rule
To get familiar with the When-Then interface we will be creating a rule that turns on lights when the temperature drops below a certain threshold and just before sunset (makes sense right?). We only want this rule to be active on weekdays. This guide assumes you are using the Demo. Otherwise you need to create some assets first.
To create an asset and configure an attribute so it can be used in rules do the following:
Creating an asset:
- Go to the
Assetspage and click the+icon - Select the
Weather Assetand name it Weather - Click
ADDto create the asset
Enabling the rule state on an attribute so it can be used in rules:
- Select the Weather asset and click on
MODIFY - Click on the
>icon of thetemperatureattribute and click on+ ADD CONFIGURATION ITEMS - Select
Rule stateand clickADD - Click
SAVEto save the changes
The remainder of the guide assumes you are using the Demo where all assets and attributes have already been created and configured:
- Switch from the
masterrealm to theSmart cityrealm in the top. You will see the assets used in the demo setup. - Navigate to the
Rulespage, here you will find some demo rules that are running at the moment. We will add our own. - Add a new rule:
- Click the
+. - Select 'When-Then'.
- Name it
Cold and sunset: lights on.
- Click the
- Create the When side of the rule:
- Click the
+, a list of asset types will appear. - Select
Weather Asset, a condition will get added for this asset type. - Switch the asset from
Any of this typetoWeather. - In the next field select the attribute of interest:
temperature. - In the next field select the operator:
less than. - Finally set a value of
10. You have now finished the first condition. This can be combined throughANDorORwith other conditions.
- Click the
- Create a second condition to take the time into account:
- Click the
+in the section below where it saysADD CONDITIONand selectTime. - Select Trigger Type
Sunset. - Set the value
-5for theOffset in minutes. - Select:
location. You have finished theANDcondition. If both conditions are met, theThenactions will trigger.
- Click the
- Create an action on the
Thenside of the rule:- Click the
+on the right in theThensection. - Select the
Light Assetasset type. - Select the lights that you want to control. In this case we want to turn on all lights at once using the
Lighting Noordereiland. - Select the attribute you want to control:
On Off. - Toggle the switch on. The Actions are done.
- Click the
- Set the schedule for this rule:
- Open up the scheduler by clicking
Always activenext to the rules name. - Select
Plan a repeating occurrenceas we want the rule to work only on weekdays. - At
Repeat occurrence everyclick the fiveweekdays - Leave the
Repetition endsatNever - Click
Applyand save the rule in the top right.
- Open up the scheduler by clicking
Your rule is finished! Every weekday the rule will check if both conditions are met and if so, turn on the lights of Noordereiland.